How to Create an OpenAI API KeyBeginner-Friendly Guide
Follow this simple step-by-step guide to create your OpenAI API key and connect it to Fabio AI Chatbot.
To use Fabio AI Chatbot, you need an AI API key: OpenAI, Mistral or Gemini. Don’t worry — creating one only takes a few minutes. Here we explain how to set an OpenAI Key, with which you will be able to use ChatGPT, follow the steps below, and you’ll be ready in no time.
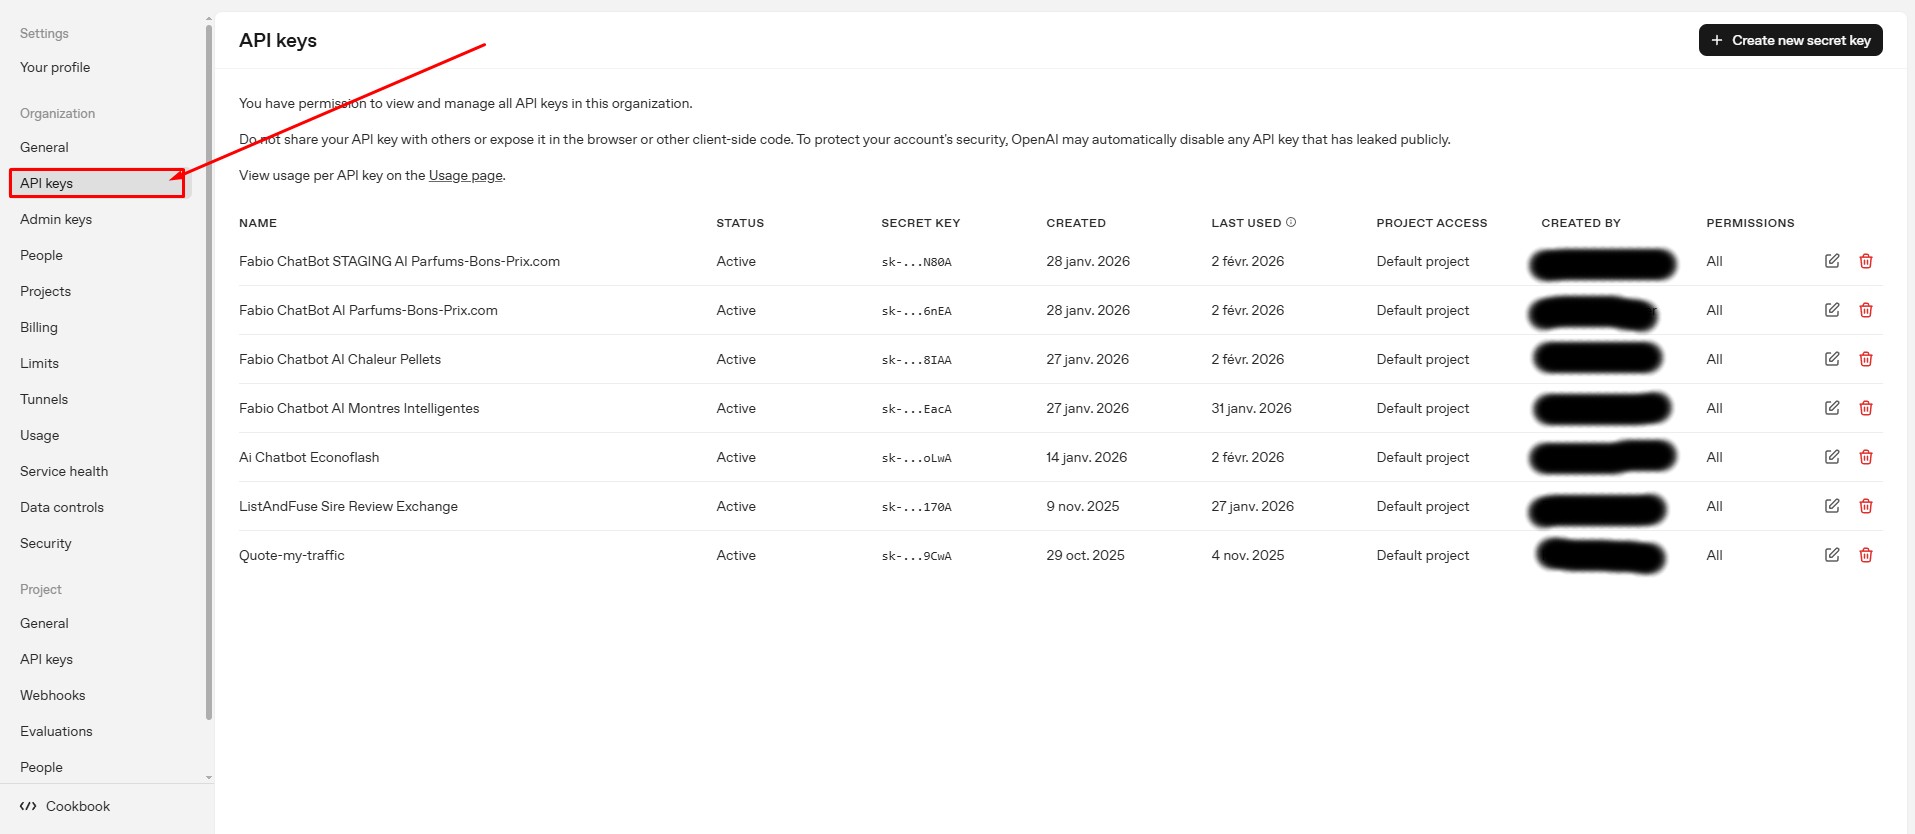
Step 1 — Go to the OpenAI Platform
First, open the OpenAI platform and access the API keys page. If you don’t have an account yet, you can create one for free.
👉 Click here to go to the OpenAI API Keys page
Log in or sign up, then stay on this page.
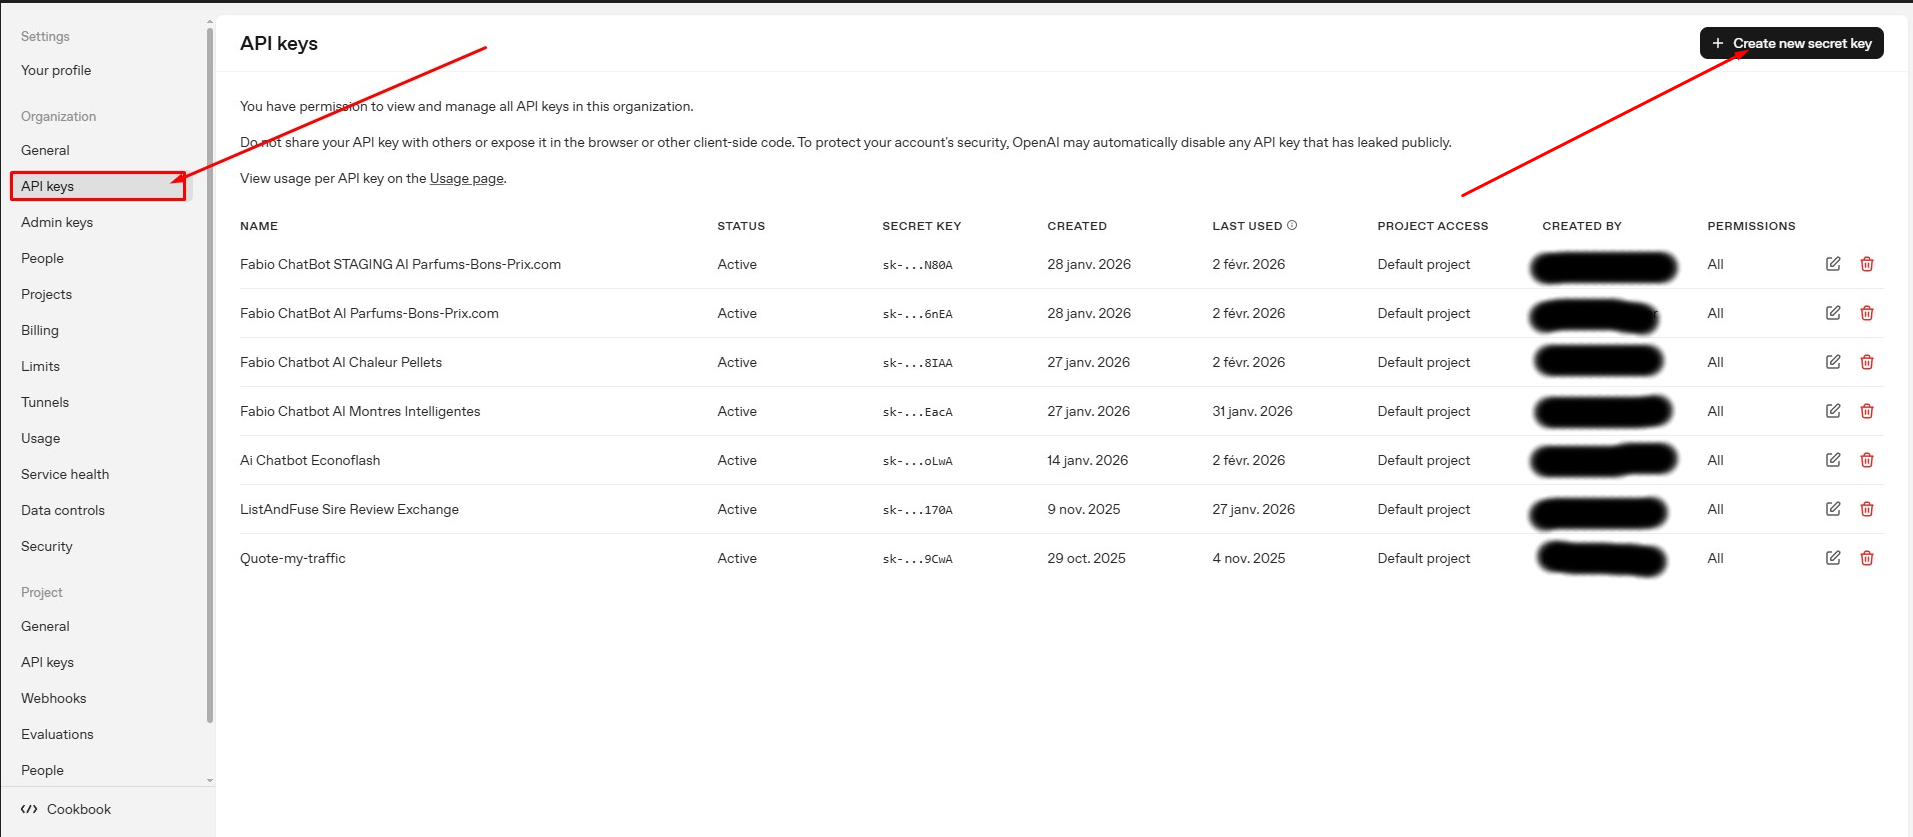
Step 2 — Create a New API Key
Once you are on the API keys page, look at the top-right corner of the screen. Click on the button labeled “Create new secret key”.
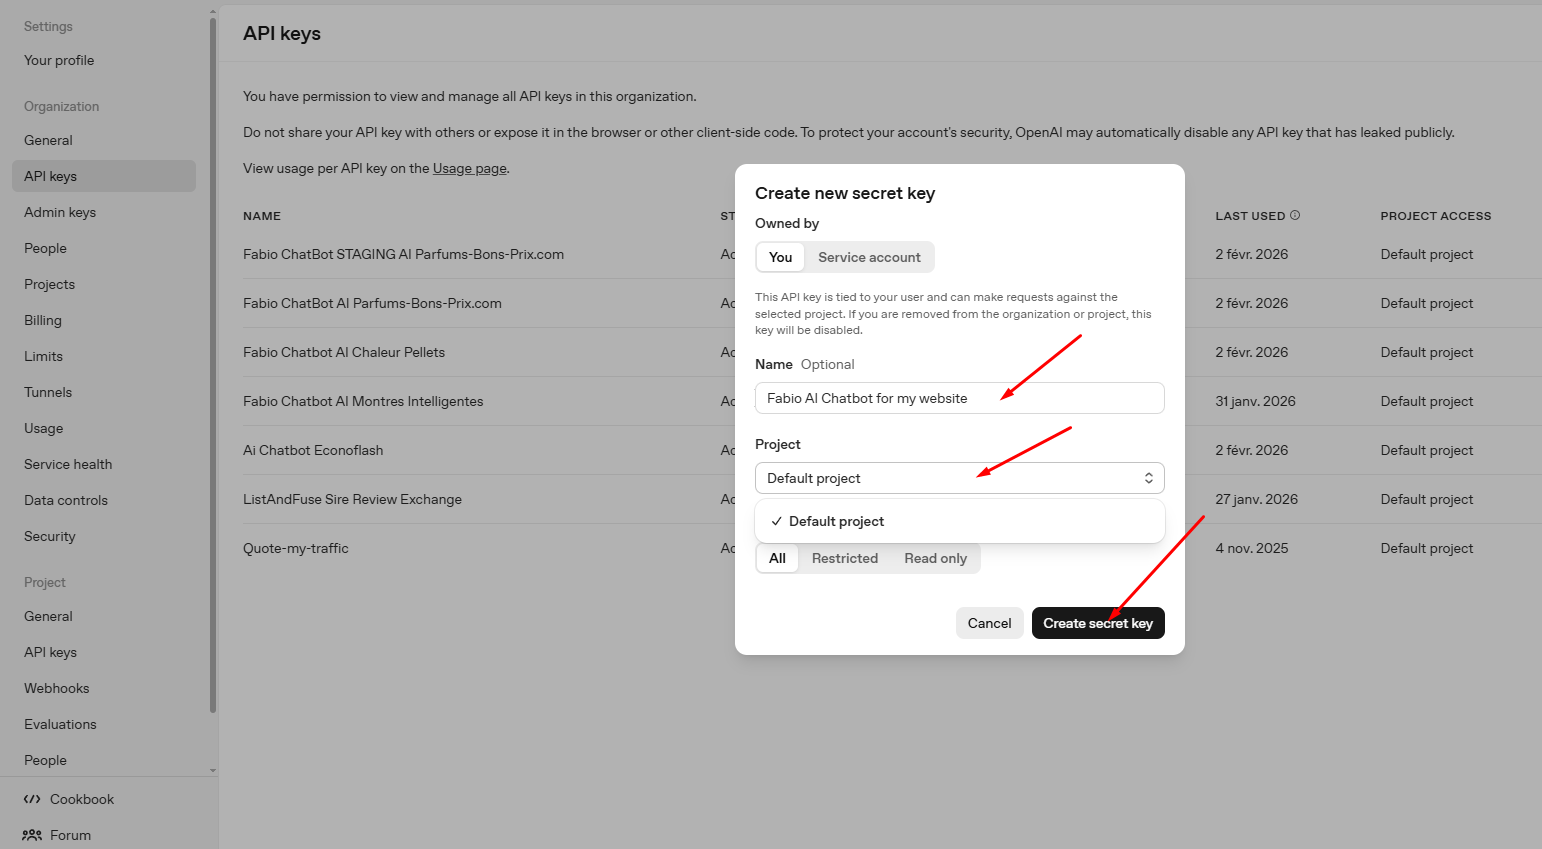
Step 3 — Fill in the Key Details
A small form will appear. Simply:
- Enter a name for your API key (for example: Fabio Chatbot)
- Select the default project (or another one if you prefer)
Then confirm to create the key.
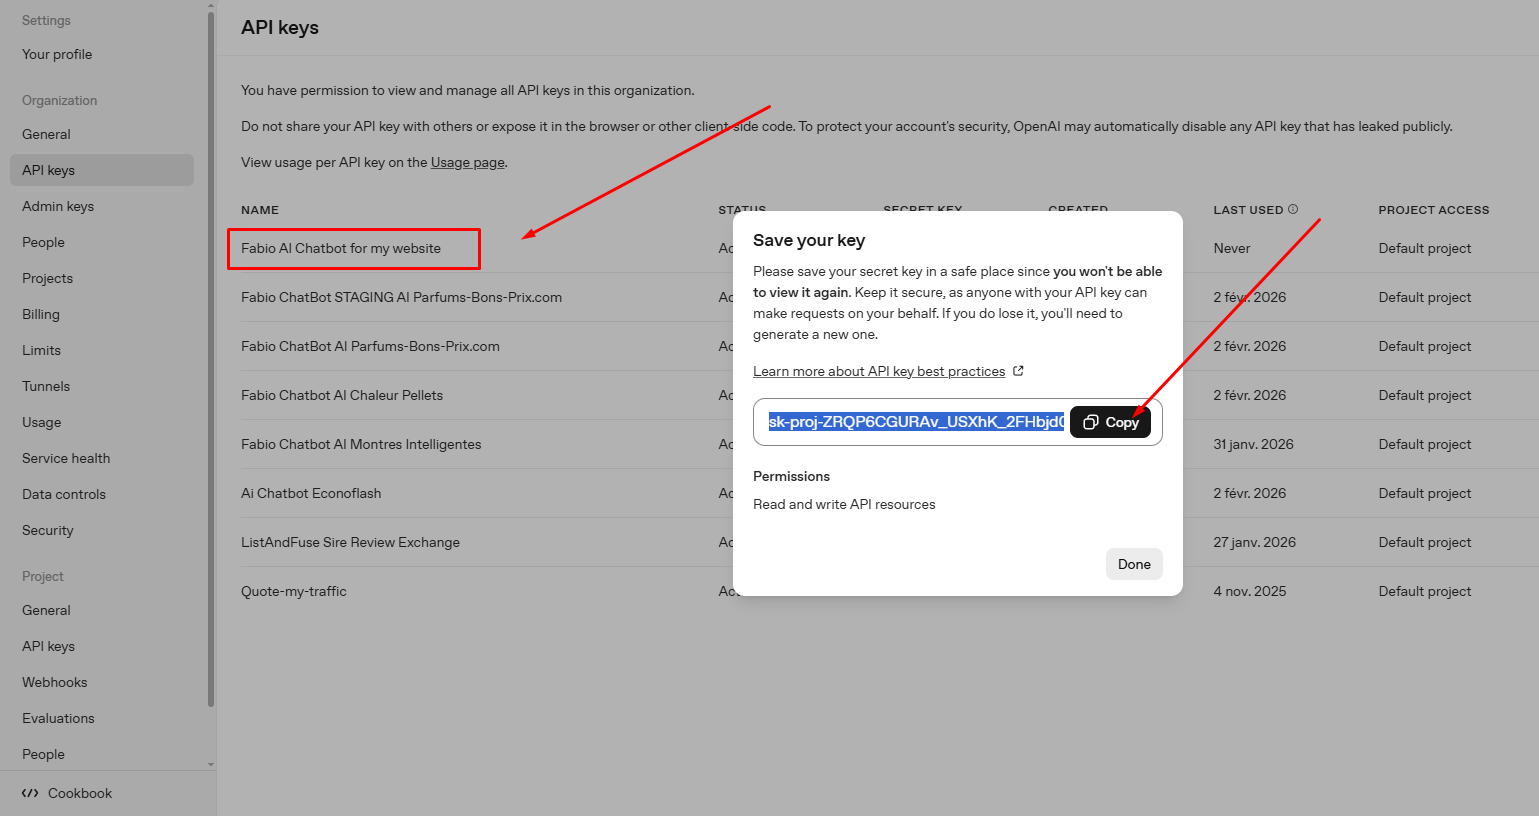
Step 4 — Copy Your API Key
Your new API key will now be displayed. Copy it immediately.
You can save it in a safe place if you wish, but it’s not mandatory — you will paste it into Fabio AI Chatbot in just a few seconds.
💡 Tip: Use one API key per domain, subdomain, or directory. This makes management easier later on.
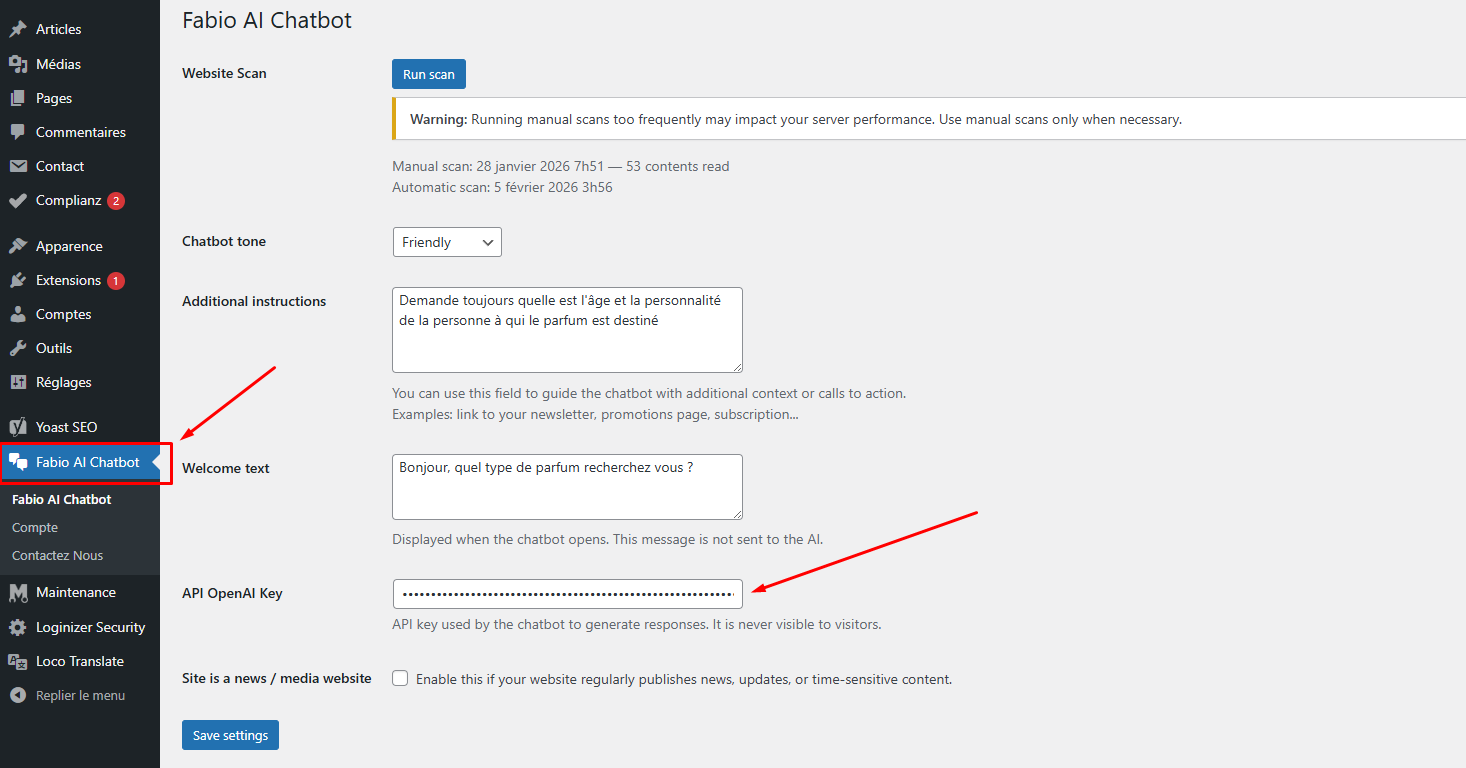
Step 5 — Add the API Key to Fabio AI Chatbot
Go back to your WordPress dashboard. In the Fabio AI Chatbot settings:
- Paste your OpenAI API key into the dedicated field
- Click Save
Once saved, the automatic site scan will start.
🎉 That’s it — your chatbot is now ready to work!