Install Fabio AI ChatBot in 2 minutes on WordPress
Follow the steps below to start your free trial, install the plugin, scan your content, and customize the chatbot before making it live on your website.
A simple setup from trial to live chatbot
From free trial to fully configured chatbot
This installation guide walks you through the full setup process so you can get
Fabio AI chatbot running quickly and confidently.
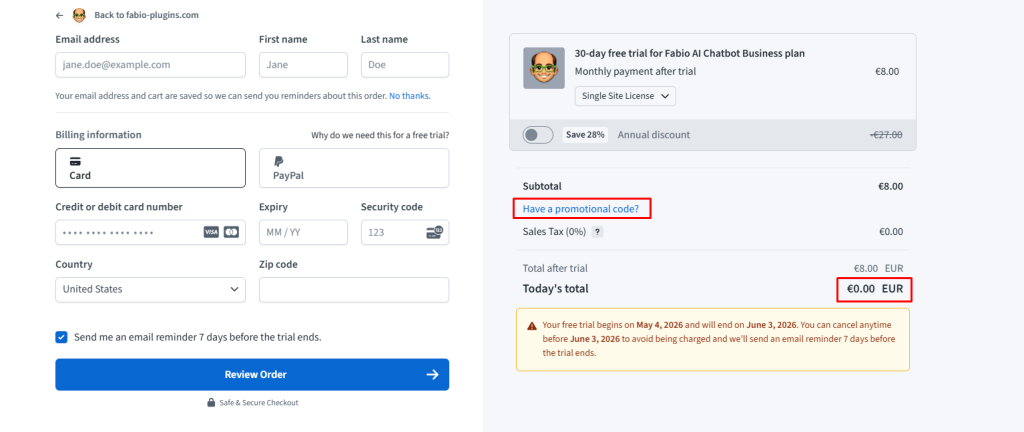
Start your 30-day free trial
Choose the plan based on the number of websites you want to use Fabio AI chatbot on. A credit card is required but no payment is made during the 30-day free trial, and payments are handled securely by Stripe via Freemius.
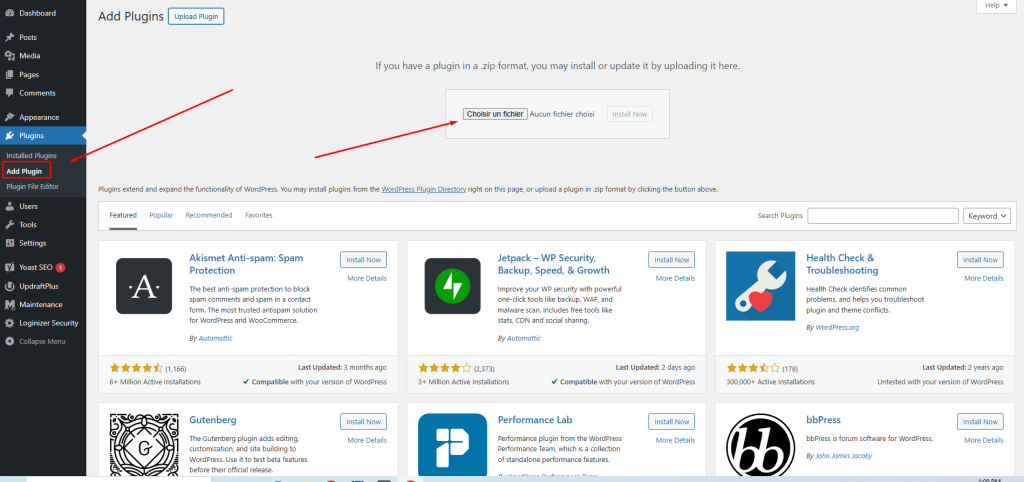
Upload the plugin
Upload the plugin file to your WordPress website, then install and activate it like you would do for any standard WordPress plugin.
Let the scan run
After activation, Fabio AI Chatbot scans your content automatically every day. The scan takes from a few seconds up to 1 minute if you have 2000 contents, including products and pages.

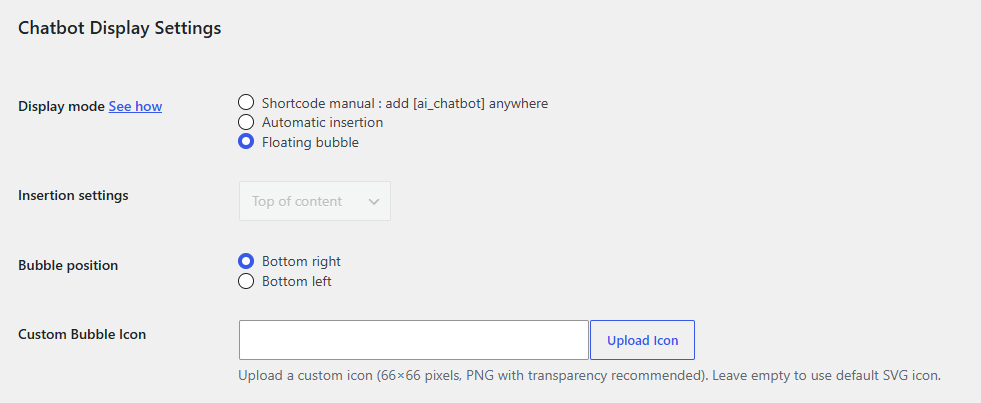
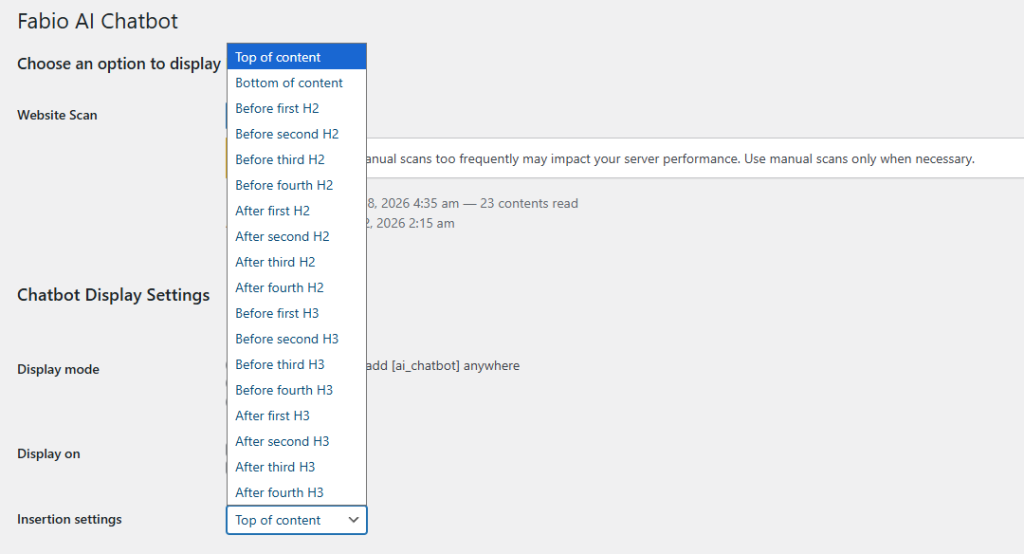
Choose how to display Fabio AI chatbot
You can choose how the chatbot appears on your website. The ChatBot can be displayed as a floating popup bubble on the left or right lower corner, with Fabio AI Chatbot standard icon or a png image of your choice. In order to match with Google’s requirements, the floating bubble doesn’t open by itself, users must click on it. The ChatBot can also be displayed to your audience as a dialogue box, after or before titles, all over your content, or manually inserted as as shortcode. Watch the Video.
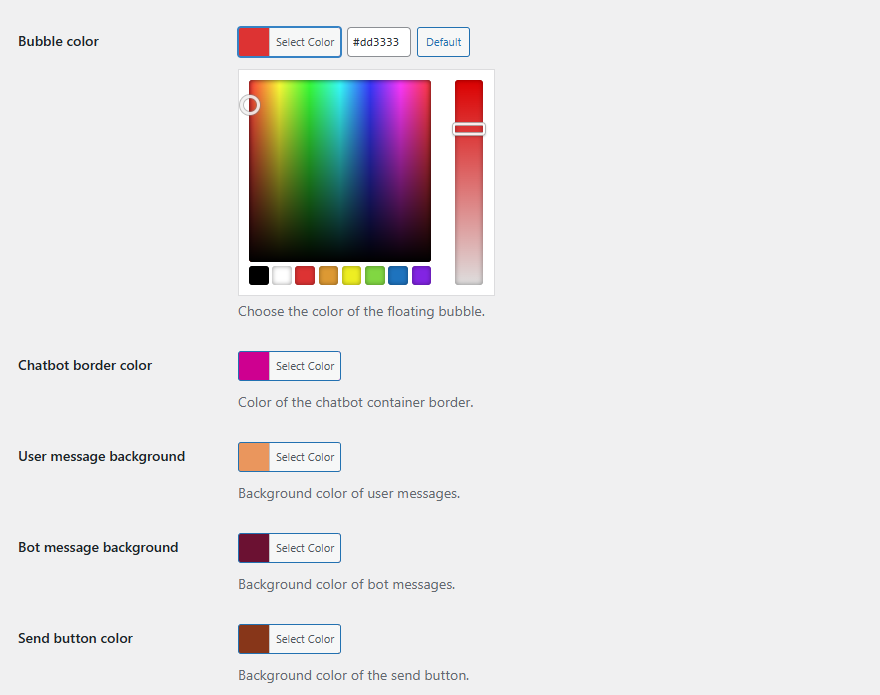
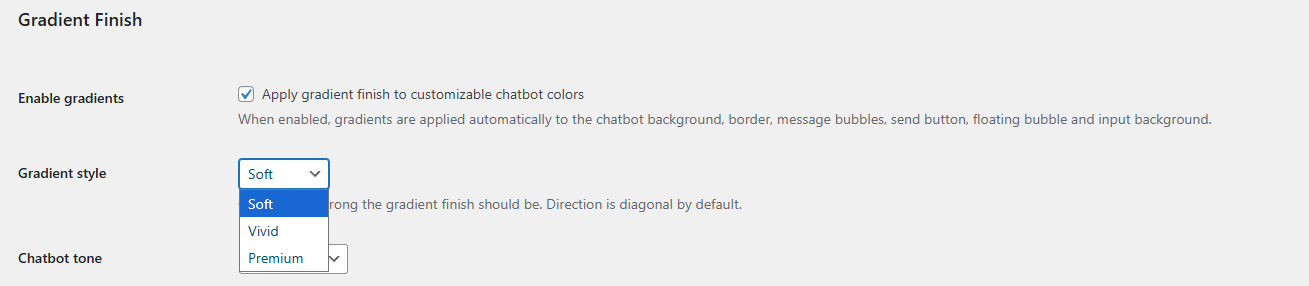
Match the chatbot colors to your website
Fabio AI Chatbot has a color picker for the bulle, the border, user question background, Chatbot answer background, chatbot background, send and close button, plus 3 choices of gradient : soft, vivid and premium. Watch The Video.
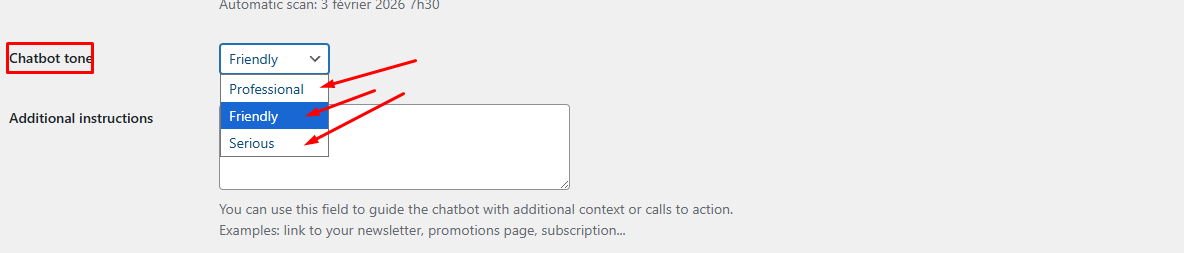
Choose the response tone
Fabio AI Chatbot can answer your visitors’ questions with a friendly, professional or serious tone, watch the video.
Friendly Tone: a warm, approachable, and conversational tone that makes users feel comfortable and welcomed. Ideal for creating a friendly and reassuring experience.
Professional Tone: a clear, polite, and balanced tone that inspires trust while remaining natural and easy to understand. Perfect for businesses that want to sound reliable without being overly formal.
Serious Tone: a formal, direct, and structured tone focused on precision and efficiency. Best suited for sensitive, technical, or highly professional conversations.
Add additional instructions and buying intent detection
Fabio Ai Chatbot allows you to give additional instructions and a welcome message to maximize your chances of turning visitors into sales, watch the video.
But there is even better : you can use the “Additional Instruction” and “Welcome message” fields to trigger a buying Intent Detection. Adding buying intent in the additional instructions field will greatly help converting visitors into sales, here is a video that explains how to use the buying intent templates.

Add your welcome message
The welcome message allows you to push users to ask a first specific question or to provide a first specific information. For example, if you are an insurance brooker : “Lets’ find the best vehicle insurance for you, how old is your car ?”. In that case, you would give these additional instructions : “users are likely to begin by telling you how old their car is”. Watch the video.

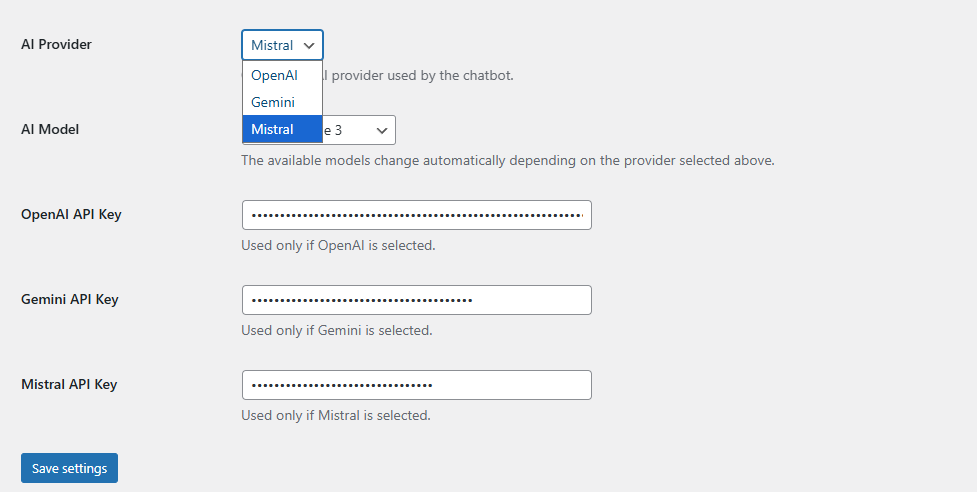
Choose your AI provider, add the API key, and save
Fabio AI Chatbot must be connected to an AI via an API key. You can choose between OpenAI, Gemini and Mistral. The AI cost is not included in the subscription price and represents about 1 USD for 100 questions + 100 answers for the best models. The AI token cost can be twice less with smaller models. Watch how to select an AI model.
Ready to install Fabio AI chatbot on your WordPress website?
Start your free trial, configure the chatbot in minutes, and help visitors find the right information faster.
Fresh content from our blog
Explore the 5 latest articles across all categories, with quick summaries and direct links to continue reading.
How Users Are Testing Fabio AI Chatbot And How It Answers
Visitors to Fabio Plugins want to know whether Fabio AI chatbot will respond exactly like a human would to their audience. To figure this out,…
Chatbot Test for Ecommerce : ChatGpt Vs Mistral Vs Gemini
AI Comparison · E-commerce Test How Fabio AI Chatbot compares AI models on a real WooCommerce product search test We tested multiple AI models available…
How to integrate Fabio AI Chatbot with your e-commerce
Fabio AI Chatbot is designed to be installed in 2 minutes on e-commerce websites. As soon as it is activated, the automatic scan starts. It…
Why you need an AI assistant for customer support
What if your customer support could answer every question instantly, guide visitors to the right pages, and turn conversations into real opportunities? Fabio AI ChatBot…